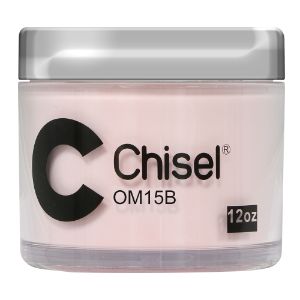
Chisel 2 in 1 Acrylic & Dipping Powder
PLEASE NOTE: Due to monitor differences, actual colors may vary slightly from what appears online.
2 oz. jar
Made in the U.S.A
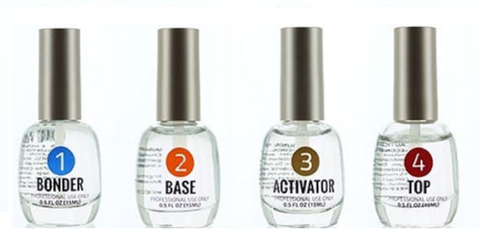
1. Apply #1 Bonder. Apply it around the cuticle area and the entire natural nail bed only.
2. Apply #2 Base. Since we applied a nail tip, there is a ridge between the natural nail and the nail tip. To blend and smooth the ridge, apply a thin layer of #2 Base along the ridge.
3. At a 45-degree angle, dip the nail into the Chisel powder and shake. Repeat for all 5 nails. Brush off the excess powder.
4. For the first colored coat, apply #2 Base to about 80% of the nail in a thin, even layer.
5. At a 45-degree angle, dip the nail into your Chisel colored powder and shake. Repeat for all 5 nails to let the Base soak into the powder. Brush off the excess powder.
6. For the second color coat, apply #2 Base to about 98% of the nail in a thin and even coat. Make sure you cover the nail evenly, including the sides and tip.
7. At a 45-degree angle, dip the nail into the same Chisel colored powder and shake. Repeat for all 5 nails and brush off the excess powder.
8. With the #2 Base, now cover the entire nail, getting as close to the cuticle as possible without touching. Make sure all angles of the nail is covered.
9. Dip a makeup brush into your second Chisel colored powder and lightly tap the powder onto the nail, focusing on the tip of the nail. Sprinkle it with a focus on the tip.
10. Angle the nail downward and with your first Chisel colored powder, scoop the powder onto the nail, focusing on the base of the nail, and blending through to the tip. Shake the nail and repeat for all 5 nails. Brush off the excess powder.
11. You’ll begin to see the ombre effect. In order to protect the nail, apply one more coat of #2 Base. Dip the nail into Chisel Clear Powder. Shake the nail, repeat for all 5 nails, then brush off the excess powder.
12. Now use #3 Activator. In order for the glue to dry, apply #3 Activator to the entire nail evenly. Be sure you have enough of the #3 Activator so it can work to dry the entire nail. #3 Activator takes 2-3 minutes to work and dry the nail.
13. While the nail is still soft, pinch the nail sides in to make the nail more narrow, which helps create the look of a slender nail.
14. Using a 180-grit file, push back the skin on the sides of the nail, then begin filing. File the tip to the desired shape. Push the cuticle back so that when you’re filing, you don’t file into the client’s cuticle.
15. With an electric file, slowly and easily file the top of the nail. It’s important not to over-file the top, especially where your colors blend, to keep the ombre effect. Then buff and cleanse with alcohol.
16. Apply #3 Activator one more time, applying it evenly. Allow it to sit for 1-2 minutes to let the Activator work into the nail.
17. Before applying #4 Top, you have to be careful as you only need one quick coat. Apply to cover the nail and the tip, clean your brush, then put the brush back. Do it for all 10 nails. After applying it to all 10 nails, wait another minute before applying the second coat of #4 Top. (If you do this step too quickly, the Activator can work against you to dull your top coat and the nails won’t stay shiny.)
18. After waiting, apply the second coat of #4 Top, freely applying it over again until you’ve covered your entire nail and tip. Be sure to clean your brush before placing it back into the bottle. Once it dries, it will stay shiny. You can inspect the nail from the sidewalls and flipped.
Instructions source: David Hoang via Youtube